How to Create a Bootable USB Drive for Windows?
To create a bootable USB drive for Windows, use the Media Creation Tool or Rufus to load Windows installation files onto an 8GB or larger USB stick. This lets you install, repair, or upgrade Windows on any compatible computer. Just follow the steps, boot from the USB, and start the Windows setup process.
This complete guide covers 3 proven methods to make Windows bootable USB drives. You will learn step-by-step instructions for Microsoft’s official tool, Rufus software, and manual creation processes.
What Is a Bootable USB Drive?
A bootable USB drive contains Windows installation files that can start your computer and install the operating system. Think of it as a portable Windows installer you can carry anywhere.
Bootable USB drives serve 4 main purposes:
- Install Windows on new computers
- Repair broken Windows systems
- Upgrade from older Windows versions
- Create backup installation media
Microsoft states that installation media like USB flash drives can install a new copy of Windows, perform clean installations, or reinstall Windows.
What You Need Before Starting
You need 4 basic items to create a Windows bootable USB drive:
- USB flash drive (8GB minimum, 16GB recommended)
- Windows computer with internet connection
- 4-6 hours for complete download and creation
- Windows product key (if not digitally licensed)
According to Microsoft Support, a reliable internet connection is required because download times vary based on connection speed.
Important: The creation process deletes all data on your USB drive. Back up important files first.
How to Use Microsoft Media Creation Tool
Microsoft’s Media Creation Tool is the official and easiest method to create Windows bootable USB drives. Research from government sources shows this tool downloads authentic Windows files directly from Microsoft servers.
Step 1: Download the Media Creation Tool
Visit Microsoft’s official download page based on your Windows version:
- Windows 11: microsoft.com/software-download/windows11
- Windows 10: microsoft.com/software-download/windows10
Click “Download Now” under the “Create Installation Media” section. The file downloads as MediaCreationTool.exe.
Step 2: Run the Media Creation Tool
Follow these exact steps to launch the tool:
- Right-click the downloaded MediaCreationTool.exe file
- Select “Run as administrator”
- Click “Yes” when Windows asks for permission
- Click “Accept” to agree to license terms
Step 3: Choose Installation Media Option
Select “Create installation media for another PC” and click “Next”.
The tool offers 2 main options:
- Upgrade this PC now (updates current computer)
- Create installation media (makes bootable USB)
Choose the second option for bootable USB creation.
Step 4: Select Windows Settings
Choose your preferred Windows configuration:
- Language: Select your region’s language
- Edition: Pick Windows Home, Pro, or Enterprise
- Architecture: Choose 64-bit, 32-bit, or both
Tip: Check “Use recommended options” to match your current computer’s settings automatically.
Step 5: Choose USB Flash Drive
Select “USB flash drive” as your media type and click “Next”.
The tool displays all connected USB drives. Select your target USB drive from the list. Double-check you picked the correct drive to avoid data loss.
Step 6: Create Bootable USB
Click “Next” to start the creation process. The Media Creation Tool:
- Downloads Windows files (3-6GB depending on version)
- Verifies download integrity
- Creates bootable USB drive
- Tests boot functionality
According to Tom’s Hardware testing, this process typically takes 10-20 minutes on modern computers with good internet connections. Research shows that USB 3.0 drives can achieve transfer speeds up to 5 Gbps in optimal conditions, making them significantly faster than older USB 2.0 technology.
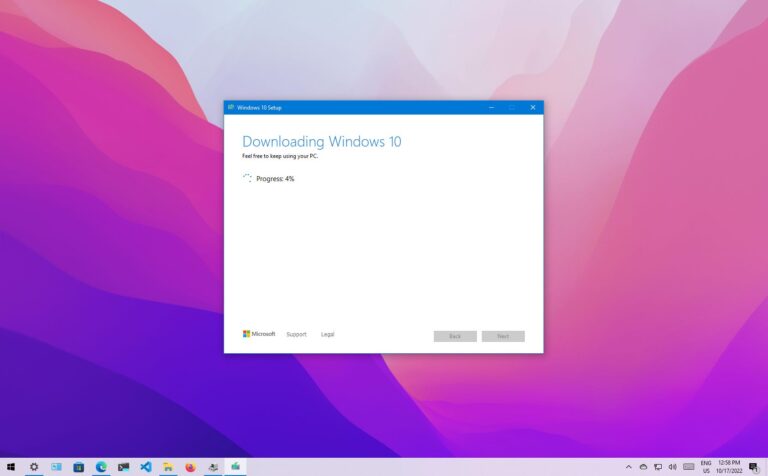
The status bar shows progress completion. When finished, click “Finish” to complete the process.
How to Create Bootable USB with Rufus
Rufus is a free, open-source tool that creates bootable USB drives faster than Microsoft’s official tool. Rufus requires no installation and runs directly from its executable file.
Why Choose Rufus Over Media Creation Tool?
Rufus offers 5 key advantages:
- Faster creation speed (up to 2x quicker)
- More format options (MBR, GPT, UEFI, BIOS)
- Works with any Windows ISO file
- Bypasses Windows 11 requirements (TPM, Secure Boot)
- Creates multi-boot USB drives
Step 1: Download Rufus and Windows ISO
Get Rufus from its official website: Visit rufus.ie and download the latest version. The file is small (1-2MB) and requires no installation.
Download Windows ISO file: Use Microsoft’s Media Creation Tool to download ISO files, or visit Microsoft’s download pages directly.
Step 2: Launch Rufus and Select USB
Insert your USB drive and run Rufus.exe. The program automatically detects your USB drive.
Verify the correct drive is selected in the “Device” dropdown menu. Wrong selection will format the wrong drive.
Step 3: Choose Boot Selection
Click “SELECT” next to “Boot selection” and browse to your Windows ISO file.
Rufus automatically detects Windows ISO files and adjusts partition scheme settings based on the selected image.
Step 4: Configure Partition Settings
Rufus automatically sets optimal settings, but you can customize:
- Partition scheme: GPT for UEFI systems, MBR for older BIOS
- Target system: UEFI for modern computers, BIOS for older systems
- File system: NTFS (recommended for Windows)
Leave default settings unless you have specific requirements.
Step 5: Start USB Creation
Click “START” to begin the process. Rufus warns that all USB data will be deleted.
Click “OK” to confirm and proceed. The creation process shows:
- File copying progress
- Speed statistics
- Estimated completion time
The process typically completes in 5-10 minutes, depending on USB drive speed and computer performance.
Manual Method: Copy Windows Files to USB
Advanced users can manually create bootable USB drives by copying Windows installation files directly. This method works for Windows 10 and requires more technical knowledge.
Step 1: Format USB Drive
Format your USB drive with these specific settings:
- Right-click the USB drive in File Explorer
- Select “Format”
- Choose “NTFS” file system
- Check “Quick Format”
- Click “Start”
Step 2: Extract Windows ISO Files
Mount or extract your Windows ISO file:
- Double-click ISO file to mount as virtual drive
- Or use 7-Zip to extract ISO contents to folder
Step 3: Copy All Files to USB
Copy all files from ISO to your formatted USB drive:
- Select all files in the mounted ISO or extracted folder
- Copy files (Ctrl+C)
- Paste to USB drive (Ctrl+V)
This method takes longer but gives complete control over the process.
How to Boot from Your USB Drive
Creating the bootable USB is only half the process. You must also configure your computer to boot from USB. This requires accessing BIOS or UEFI settings.
Step 1: Insert USB and Restart Computer
Connect your bootable USB drive to the target computer. Restart the computer and prepare to access boot settings quickly.
Step 2: Access Boot Menu
Press the boot menu key immediately when your computer starts:
Common boot menu keys:
- F12 (Dell, HP, Lenovo)
- F11 (MSI, ASUS)
- F10 (Acer)
- F8 (older computers)
- ESC (some HP models)
Keep pressing the key until boot menu appears.
Step 3: Select USB Drive
Choose your USB drive from the boot menu list. It may appear as:
- “USB-HDD”
- “Removable Device”
- Your USB brand name
- “UEFI: [USB Name]”
Press Enter to boot from USB.
Step 4: Start Windows Installation
Windows Setup loads automatically from your bootable USB. Follow the installation wizard to:
- Choose language and region
- Enter product key (or skip for digital licenses)
- Select installation type (Custom or Upgrade)
- Choose target drive for Windows installation
- Wait for installation completion
Common Problems and Solutions
What Is the Most Common Bootable USB Problem?
The most frequent issue is “USB drive not recognized in boot menu.” This happens because:
- USB drive isn’t properly formatted
- Computer doesn’t support USB booting
- BIOS settings block USB boot
- USB drive is connected to wrong port
Problem: Computer Won’t Boot from USB
Try these 4 solutions in order:
- Use different USB ports (try USB 2.0 ports on older computers)
- Disable Secure Boot in UEFI settings
- Enable Legacy Boot or CSM mode
- Recreate bootable USB with different tool
Problem: “Boot Device Not Found” Error
This error means your USB isn’t properly bootable:
- Recreate USB with Media Creation Tool
- Try Rufus with MBR partition scheme
- Use different USB drive (some drives don’t support booting)
Problem: Windows Installation Fails
Installation failures usually stem from:
- Insufficient disk space (need 20GB minimum)
- Hardware compatibility issues
- Corrupted installation files
- Bad USB drive or connection
Solution: Download fresh Windows files and use different USB drive.
Advanced Tips for Power Users
How Can You Create Multi-Boot USB Drives?
Multi-boot USB drives contain multiple operating systems on one device. Use tools like YUMI or Ventoy to create drives with Windows 10, Windows 11, and Linux distributions.
Creating Persistent Linux USB
Persistent Linux USB drives save changes between reboots. This creates portable Linux environments you can customize and carry anywhere.
Using Network Boot (PXE)
PXE allows computers to boot over network connections. IT professionals use this for deploying Windows across multiple computers simultaneously.
Best USB Drives for Windows Installation
What Size USB Drive Do You Need for Windows?
Windows 11 requires 8GB minimum, but 16GB is recommended for comfort. Larger drives provide space for additional software and drivers. The Federal Trade Commission notes that the NIST Cybersecurity Framework emphasizes protecting portable devices like USB drives through proper security controls.
Top USB Drive Recommendations:
- SanDisk Ultra (32GB) – Fast, reliable, affordable
- Kingston DataTraveler (16GB) – Durable construction
- Samsung BAR Plus (64GB) – Premium speed and build quality
Choose USB 3.0 or higher for faster file copying and installation speeds.
Security Considerations
How Do You Verify USB Drive Safety?
Only use trusted USB drives from reputable manufacturers. Cheap or unknown drives may contain malware or fail during critical installations. The Cybersecurity and Infrastructure Security Agency (CISA) recommends encrypting all removable media and using AES-256 encryption for maximum security.
Security best practices:
- Scan USB drives with antivirus before use
- Download Windows only from Microsoft’s official sites
- Verify ISO file hashes when available
- Use dedicated USB drives only for Windows installation
For Nokia device owners looking to transfer files or manage their smartphones, check out our guides on how to transfer WhatsApp from old Android to new Android and Android app cloning methods.
Final Thoughts
Creating a bootable USB drive for Windows is simple with the right tools and steps. Microsoft’s Media Creation Tool offers the easiest official method, while Rufus provides more advanced options and faster speeds. Both methods create reliable installation media for Windows 10 and 11.
Remember to back up important data before starting, use quality USB drives, and keep your bootable USB in a safe place for future use. Whether you’re installing Windows on a new computer, upgrading an old system, or preparing for emergency repairs, a bootable USB drive is an essential tool for any Windows user.